
Wednesday, May 27, 2015
12 Days of Photoshop - Day 7
For the 7th day, we were given the project "Evil Disney Princesses" or something like that. Mash up a villain and a Disney princess or Pixar character etc. I chose Mike Wazowski and the Hulk...Although I just realized that neither are villains. Anyways, I erased Mike's arms and legs and pasted his face onto the Hulk after erasing the Hulk's hair. After pasting, I changed the hue/saturation of Mike's face to match the Hulk's. I couldn't add shadows and other dark thingies like the Hulk but it still looks good. I also drew a black line around Mike's head to match the Hulk's theme.

AOIT Art One Final Exam Pt. 3
I think the Skittles artwork was my most successful because I collaborated with others and solved problems. The balloon project was the reason behind the giant Skittles bag. Without the help of my group, Morgan, Mary Kate, Olivia, and Brenda, we never would've finished this balloon project. We all pitched in to paint the balloons and the red sheet of paper that would become the wrapper. We also solved multiple problems such as a small time frame. We worked fast and skipped much of the wrapper save the actual name Skittles and one skittle. Another problem we encountered was how do we put the skittles so that we can actually see the balloons? Mr. Sands helped us solve that problem by placing newspaper and extra scraps of stuff inside the wrapper to make it stuffed and then actually place the skittle balloons outside the bag. We also experienced some malfunctions such as a balloon popping and getting white out all over Morgan but we washed that off so it wasn't a problem. This is the final project.


If I could, I would choose to redo my acrylic painting. It was horrible. I had not known that there were two different blues and I wasn't aware so I used the violet-blue for my sky and blue for the lake which looked horrible because the colors clashed. Also I was messing around a lot so I didn't really finish the painting and it was just a bad start to art class.


AOIT Art One Final Exam Pt. 2
I Developed my Art Making Skills
Throughout this year in Art One, I learned new techniques and processes and gained skill with materials I was already familiar with. The artwork I chose was part of the 12 Days of Photoshop. "Movie Parody Poster" utilized my skills in photoshop and taught me new techniques as well. Some skills I sharpened during this project (in which I parodied a blockbuster movie with my world history teacher) were using the hue/saturation tool, lasso tools, and manipulating the layers. I learned a new tool called the clone stamp tool which copied image styles over. Using all these skills in photoshop helped me create this masterpiece.

AOIT Art One Final Exam Pt. 1
Technology Piece -
For the technology piece of artwork, I chose the first part of the post-it note project. The first part involved picking a person to pixelate. I chose the current new principal, Dr. Diann Kearney. I pixelated her face using technology, photoshop, and this required art skills because I had to pick certain colors that would contrast and go along well with each other. In photoshop, I used the grid affect to make the image of Dr. Kearney appear pixelated. The colors I chose for Dr. Kearney were shades of blue, green, yellow, orange, and purple. Art played a role in this technology piece when deciding which colors to choose.


Art Piece -
For the art piece, I chose the second part of the post-it note project. The second part required a group to actually place the sticky notes in the grid order decided from the first part of the project. This part required teamwork, patience, and a steady hand to place the sticky notes. This project relied on the technology used from the first part of this post-it note project, e.g., photoshop. Without the photoshop used earlier to pixelate the image, the sticky note part would be extremely hard, practically impossible. After dividing the paper into grids to put sticky notes on, the whole group worked together to put the post-it notes on the paper and finish the image. The 2 images chosen were Paul Walker and Morgan Freeman. This is the result of the technology part, the photoshop.

We used some great teamwork to finish the project


These are the finished projects.


Thursday, May 21, 2015
12 Days of Photoshop - Day 6
For the sixth day of photoshop, the project called " Movie Parody Poster" required the help of one of my previous teachers, Mr. Cooper. I used the movie called Looper starring Bruce Willis and I replaced him with Mr. Cooper instead. First I cropped out the L of Looper and cropped the O into a C for Cooper. I edited around the light shadows effects on the poster using the stamp tool and took a picture of Cooper. After pasting the image of his face on the poster, I used blur and sharpen and stamp tools to adjust his face and make it fit into Willis' previous shape. I also edited the name that originally said Bruce Willis into Roy Cooper. I adjusted the hue/saturation of Cooper's face to match that of the poster and it looks eh. I will show it to Cooper tomorrow.

Tuesday, May 19, 2015
12 Days of Photoshop - Day 5

Monday, May 18, 2015
12 Days of Photoshop - Day 4
On the fourth day of photoshop, we were introduced to the project, "Literal Interpretations". Take 5 compound words and create 5 images that show the words literally. For example, a firefly would be a fly on fire. The 5 words I chose were


firefighter
Relatively simple, cropped out the other boxer from the picture and pasted in an image of fire and transformed it to make the picture fit.
headquarters
Also simple, just copy and pasted the quarter onto his head after taking out the white background of the coin.

rattlesnake
Removed background from snake and rattle, then copied the rattle onto the snake and used blur tool to match the tail in the back which wasn't focused on.
watchdog
Removed the background from the watch, blurred it slightly, and cropped out the back so it would appear to actually be on the dog.

weatherman
Copy and pasted a picture of the cloud onto his head after removing its background.
Thursday, May 14, 2015
12 Days of Photoshop - Day 3
On the third day of photoshop, our project was "Some Scrambled Bodies Looking All Crazy!" The main idea of this project is to put body parts where they might not usually be. An example Mr. Sands showed us was the generic hands on fingers.


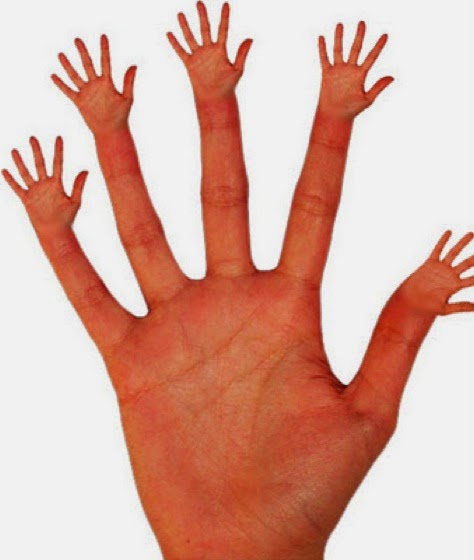
I got my idea from spy kids, those ninja thumb guys whose whole bodies were thumbs:

For my scrambled body parts, I chose a regular business guy

and a picture of a hand

I cropped out two of the fingers and transformed it until it seemed to fit his pants and body measurements. Afterwards, I cropped out his legs and placed the fingers underneath him and used blur and smudge effects to make it look as if his belt turned into fingers. This is the final product

Wednesday, May 13, 2015
12 Days of Photoshop - Day 2
On the second day, we did the project "True Identity" which is basically a reflection or shadow that shows an object/animals true self. For this project we used photoshop to make a shadow effect and I chose Kermit and Jim Henson, creator of The Muppets.


First I cropped Henson out of his photo and decided on a stage background. Then I cropped the white background from Kermits picture. I painted Kermit black and used blur and a lighter opacity to make it seem like a shadow, faded. After that, I pasted Kermit onto the stage and added Henson as well. After some editing and transforming, this is the final product, Jim Hensons true identity is Kermit or vice versa.

Tuesday, May 12, 2015
12 Days of Photoshop - Day 1
For the first day of 12 Days of Photoshop, we did "Something Sliced" which is the technique in which you slice an animal or object or food open and there is something unexpected inside. An example Mr. Sands showed us was a frog sliced open and a watermelon inside.

For my sliced project, I decided to do a lime inside a kiwi because both fruits are green and look cool.


The final project ended up pretty well considering I added a drop shadow both inside the lime and outside the kiwi.

Monster Final Project
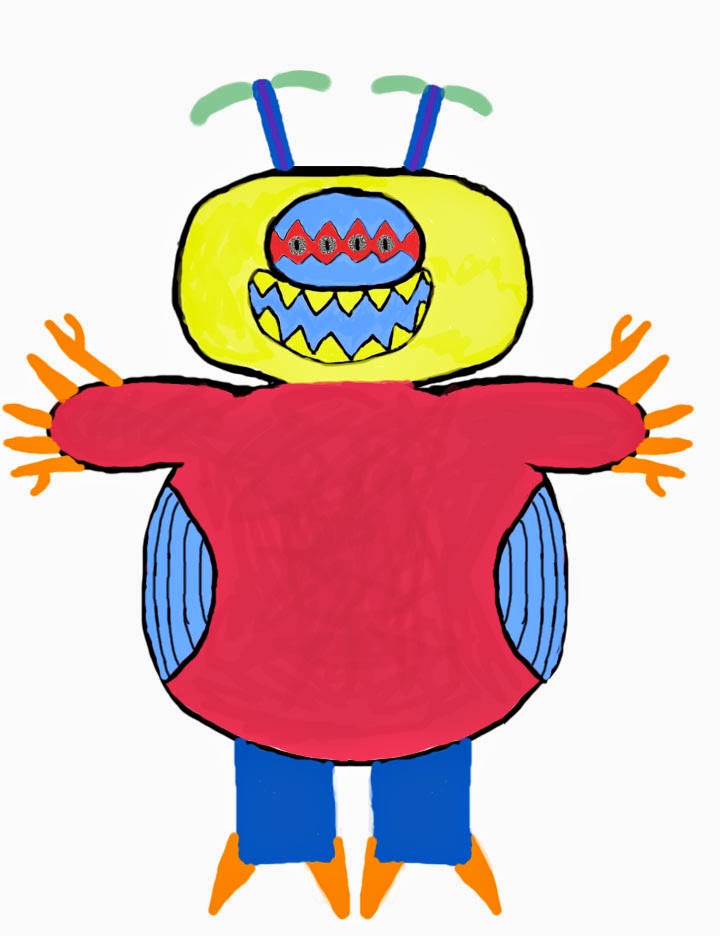
For this monster project, first graders from Apex Elementary School drew monsters and our job was to sculpt them out of clay and design a package idea as well as packaging them. The monster I got was drawn by a kid name Micah and it was relatively rounded and had a circular image to it.


I had to adjust the leg size because the heavy weight of the clay could not stand on two blue sticks. After painting the Micahsaur, I added blue wires to the top of his head rather than more clay and I actually forgot to add orange sticks for his fingers and toes. But the clay model resembles Micahsaur so it is okay. I didnt have googly eyes to add so I just drew in the eyes with black pen.
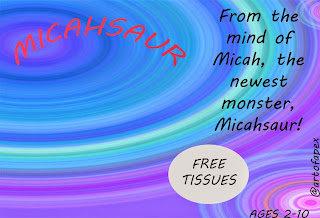
For packaging, I used photoshop and the circles pattern. I forgot to put tissues in the package. Sorry kid. But it looks pretty great so they should be greatful

This is the Micahsaur I drew on photoshop to use on the box that we had spray painted the day before. We used the bamboo tablet things to draw on and it was hard at first but we got the hang of it after a while.
Monday, May 11, 2015
Anamorphosis Final Project
Anamorphosis is a distorted projection or perspective that requires the viewer to use special devices or a specific vantage point to view the image the correct way. The anamorphosis we incorporated into our drawings was the technique the angle was distorted. An example Mr. Sands showed us was the rubix cube as shown below:


.JPG)


When viewed at a certain angle, the rubix cube looks normal and 3D.

However, this is the actual image printed out when viewed straight on

After finding an image to use online, we used photoshop to transform the object (lengthen and skew) and then printed it out after checking to be sure it would look normal. Once the image was printed, to make the object look more authentic, we cut the white space around the top of the object to make it look as if it popped off the page. I tried my hand at this project and I chose a chair.
This is the original chair image

This is the chair image after i lengthened and skewed it in photoshop and printed it out.
Viewed at an angle:
.JPG)

The chair viewed straight on:

I am currently copying the image over onto a blank sheet that I drew a grid on as well.

Wednesday, April 22, 2015
Post-It Note Project
For the post-it note final project, first I made my own pixel-ized image to submit. I chose the image of our current principal, Dr. Kearney.

However, the images of Morgan Freeman and Paul Walker were chosen to make over mine. My table made the left half of Walker's face and the table beside us made the right half. This is the image we had to use -

However, the images of Morgan Freeman and Paul Walker were chosen to make over mine. My table made the left half of Walker's face and the table beside us made the right half. This is the image we had to use -
This is me working on the sticky note project -

This is my group working together kind of -


This is me working because I am cool -

This is me chipmunking -

This is Morgan's head -

This is a zonkey Mr. Sands drew -

The finished Morgan Freeman at AHS -

The finished Paul Walker at Cary Towne Center -

Subscribe to:
Posts (Atom)